HelpDesk-Wiki Moodle Exams (exam)
This page is primarily intended for instructors in the departments of the University of Applied Sciences Potsdam who wish to conduct their teaching using Moodle exams. The focus is on the organizational and technical processes as well as the legal framework for the development, implementation, follow-up, and completion of online exams with Moodle during the semester. Regular Moodle support for conducting an online exam is provided by the decentralized Moodle administrators from the departments.
Moodle exams (exam)
Moodle exam is a separate Moodle instance of the University of Applied Sciences Potsdam for online exams. exam is an optional service for lecturers at the FHP departments. Only lecturers and students who have a Campus.account have access to exam. When you first log in with your campus account, you must first confirm the privacy policy and terms of use. You can access Moodle exams (exam) via the following web address:
Table of contents
Arrive
Develop a repository for exam questions
- Establish test workflow
- Create prototype Moodle course in development area
- Develop question collection(s)
- Didactic development of online exam questions
- Create test Import questions
- Set assessments
- Create test Import questions
- Establish test workflow
Set up an e-exam
- Create an online exam course in the Online Exams area
- Set up course enrollment
- Import course template for the exam
- Import questions
- Set up assessments
- Optional settings
- Formative self-tests
- Mock exam
- Duplicate sections
- Set prerequisites for the test
- Health and independence declaration
- Disability accommodations
- Safe Exam Browser (SEB)
- Establish test workflow
Conducting e-exams
- Onboarding students before online exam
- Notification with template
- Prepare presentation and handout for onboarding
- Allocate seats if necessary
- Procedure for course instructors
Follow-up to e-exam
- Archiving process for online exams
- Audit-proof archiving with Quiz Archiver (activity test)
- Further information on Quiz Archiver (activity test)
- Exporting evaluations as Excel files
- Setting up repeat exams
- Conducting repeat exams
Completion of e-exam
- Grade recording
- Announcement of grades
- Quality assurance
- Miscellaneous
Planning and coordination of the framework conditions
For general support, creation and administration of Moodle courses, lecturers should contact the responsible staff in the departments, see the following list:
| Process Create online exam course in Moodle exams (exam) | |||
| Participants | Departments | Central IT (ZIT) | Central Organisation for Teaching and Learning (ZESL) |
| Step | Time (recommendation) | Responsibility | Support for |
| Planning and coordination of framework conditions | by the 30th of June (winter semester) / by the 31st of January (summer semester) | Lecturers | Decentralised examination administration |
| Development of an examination course | by the 31st July (winter semester) / by the 28th of February (summer semester) | Lecturers | If necessary, media-didactic counselling by ZESL (advice on exam design, testing of the prototype) |
| Creation of the examination course | Parallel to the creation of the Moodle course | Lecturers (FHP course creator / in role) | If necessary, decentralised Moodle supervisors |
| Setting up the examination course | up to 2 weeks before the examination date | Lecturers (FHP course creator / in role) | |
| Registration of students | up to 1 week before the examination date | Lecturers or students | |
| Realisation of the course | Exam date | Lecturers | IT service if necessary |
| Archiving (Quiz Archiver) | Immediately after the examination date | Lecturers | |
| Posting of grades (MyCampus) | up to 6 months after the examination date | Lecturers | |
| If necessary, conduct the first and second repeat examination | Exam date | Lecturers | IT service if necessary |
| Archiving (Quiz Archiver) | Immediately after the examination date | Lecturers | |
| Posting of grades (MyCampus) | up to 6 months after the examination date | Lecturers | |
| Semi-automatic deletion (Course Lifecycle) | 2 years after implementation year | ZIT | |
Orientation on Moodle exams (exam)
For initial orientation, watch the video tutorial on exam. The course structure in Moodle is hierarchical. A course area can contain further course areas as sub-areas. Theoretically, Moodle courses can be created at all levels. However, this is not desirable on Exam because of automatic deletion. It also makes it difficult for students to find the right course again.
Moodle exam courses should only ever be created at the sub-level of a semester. It is important that you familiarise yourself with the course structure on exam at the beginning, under "All courses". The areas invisible to students are greyed out. As a lecturer, you will only see these if you are logged into exam and have the corresponding rights as an FHP course creator. There are now the following main areas on Exam:
- Online exams for all current online exams of the departments in the semester. All Moodle courses are automatically deleted in accordance with legal regulations. The time of deletion is 2 years after the end of the year in which an online exam was conducted. The key year is the year entered in the settings below for the course filter. Here you create a new Moodle course for a planned online exam including repeat exams in each department under the current semester. You can import your own course template from the development area into this course. Students cannot remove themselves from courses in this area. This means that your submissions, tests or other exam-related activities remain linked to the course and your accounts.
- Special cases (invisible): for online exams in which there were special incidents that should not be deleted automatically, but manually after the special case has been clarified.
- Trial exams and demo courses Students can only remove themselves from courses in this area. In all other areas on exam this is not possible for legal reasons.
- Development area: After participating in the "Introduction to exam" workshop, lecturers are given their own course area in this section for developing online exams. Courses are not automatically deleted in this course area. The course templates are therefore retained regardless of the semester. It is therefore advisable to develop the template for the online exam in this area and import it later into another course in the online exams area. In this way, the original online exam is always retained.
- Course templates The course templates help to set up and organise the process of an online exam form in a Moodle course. The standardised template makes it easier for students to find their way around an online exam. Students can try out the templates in the mock exam and the demo courses.
- Recycle bin (invisible): for manual deletion of Moodle courses. Please note: Courses in the online exams section are deleted automatically. All other courses, e.g. from the development area, can be moved to the recycle bin area for annual semi-automatic deletion.
Processes for online examination forms (standard)
Here you will find an introduction to the online examination form and a step-by-step guide to implementing the process.
Open book exam (distance)
Written exam at a distance, usually with Moodle tasks
Other formats
The development of further standard online examination forms is planned from the end of 2025.
Accounts, roles and rights for lecturers
At the beginning of your employment, you will receive a Campus.account from the Central IT Services, which you can also use to log into ecampus. When you log in to ecampus for the first time, you must confirm the data protection declaration and the user declaration before you are granted access to the platform.
If you have a Campus.account as an external lecturer, the same procedure applies to you as for FHP lecturers. If you are only teaching at FHP for a short time without a campus account, please contact your decentralised Moodle supervisors to obtain a temporary account for one Moodle instance only.
You will find the most important roles and rights for lecturers on ecampus in the accordion.
Accounts, roles and rights for students
At the beginning of their studies, students from the departments receive a Campus.account from the Central IT Services, which they can also use to log into ecampus. When you log in to ecampus for the first time, you must confirm the data protection declaration and the user declaration before you are granted access to the platform.
Self-enrolment in a course
Self-enrolment with an enrolment key is the most common method students use to enrol in a Moodle course. When creating the enrolment key, it is important to follow a few basic rules (see accordion tab “Login problems enrolment key (standard)”).
Before sending the enrolment key to students, always check that it matches the course. If error messages appear during enrolment, instructors should first check whether the enrolment key sent matches the actual enrolment key. You can find out where to find the enrolment key in the accordion tab “Self-enrolment, with enrolment key (standard)”.

Further methods of enrolment in a course (selection)
With the following enrolment methods, enrolment is carried out by the person responsible for the course. Students cannot enrol in a Moodle course themselves.


Establish test workflow
Procedure (recommendation)
The SEB and the default settings for the strict online exam make it difficult to test the online exam easily. You should therefore plan a test strategy in several phases with your team.
Create an online exam course in the area of online exams
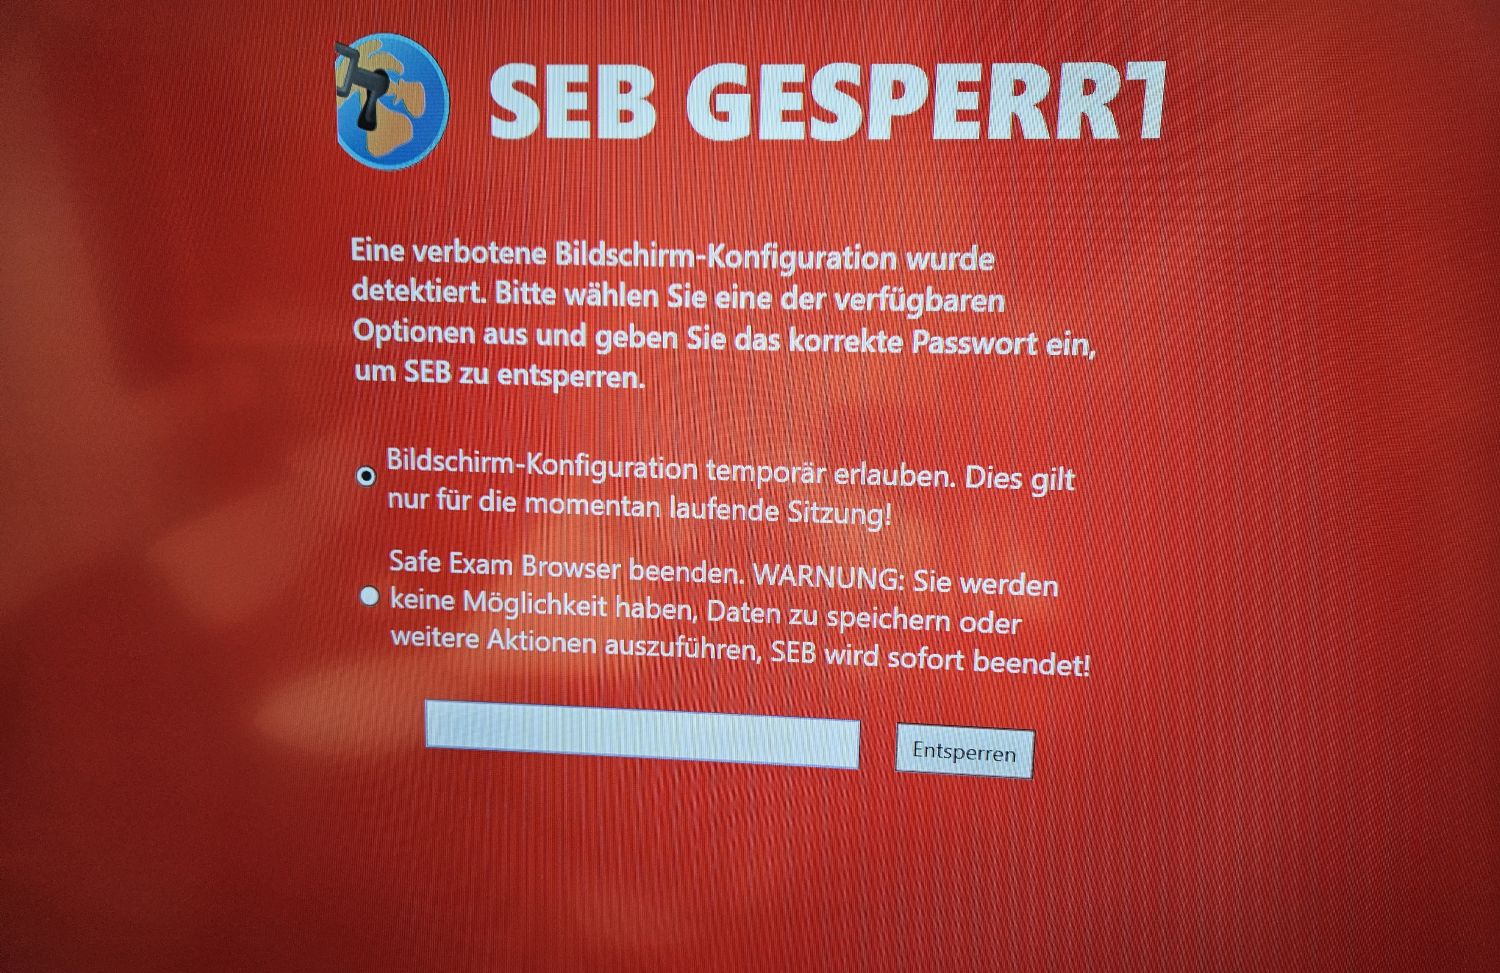
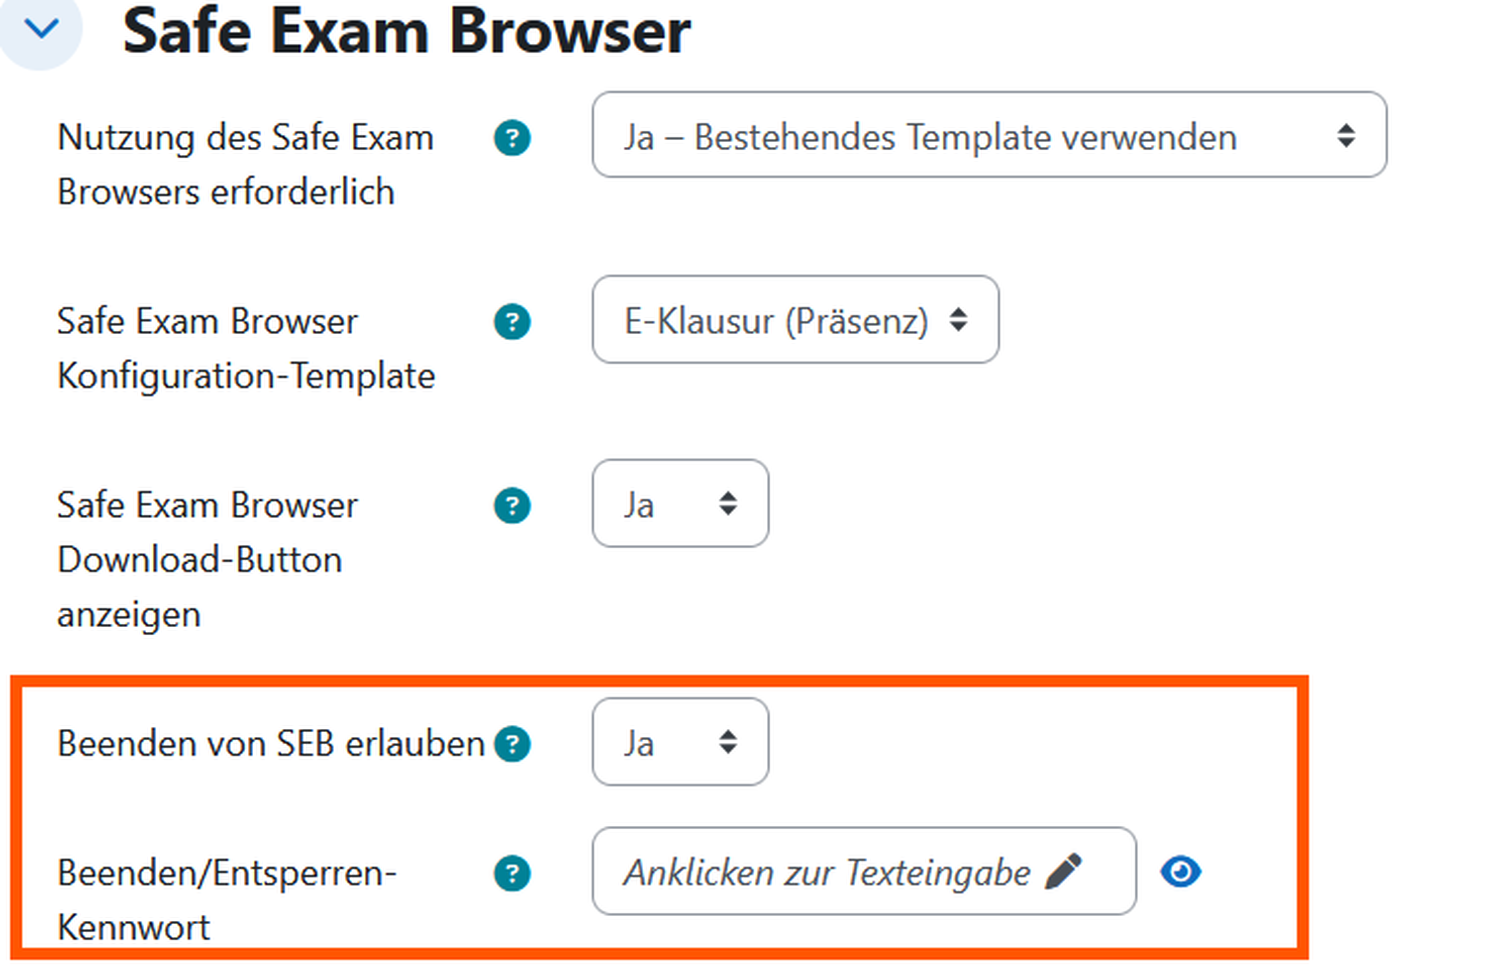
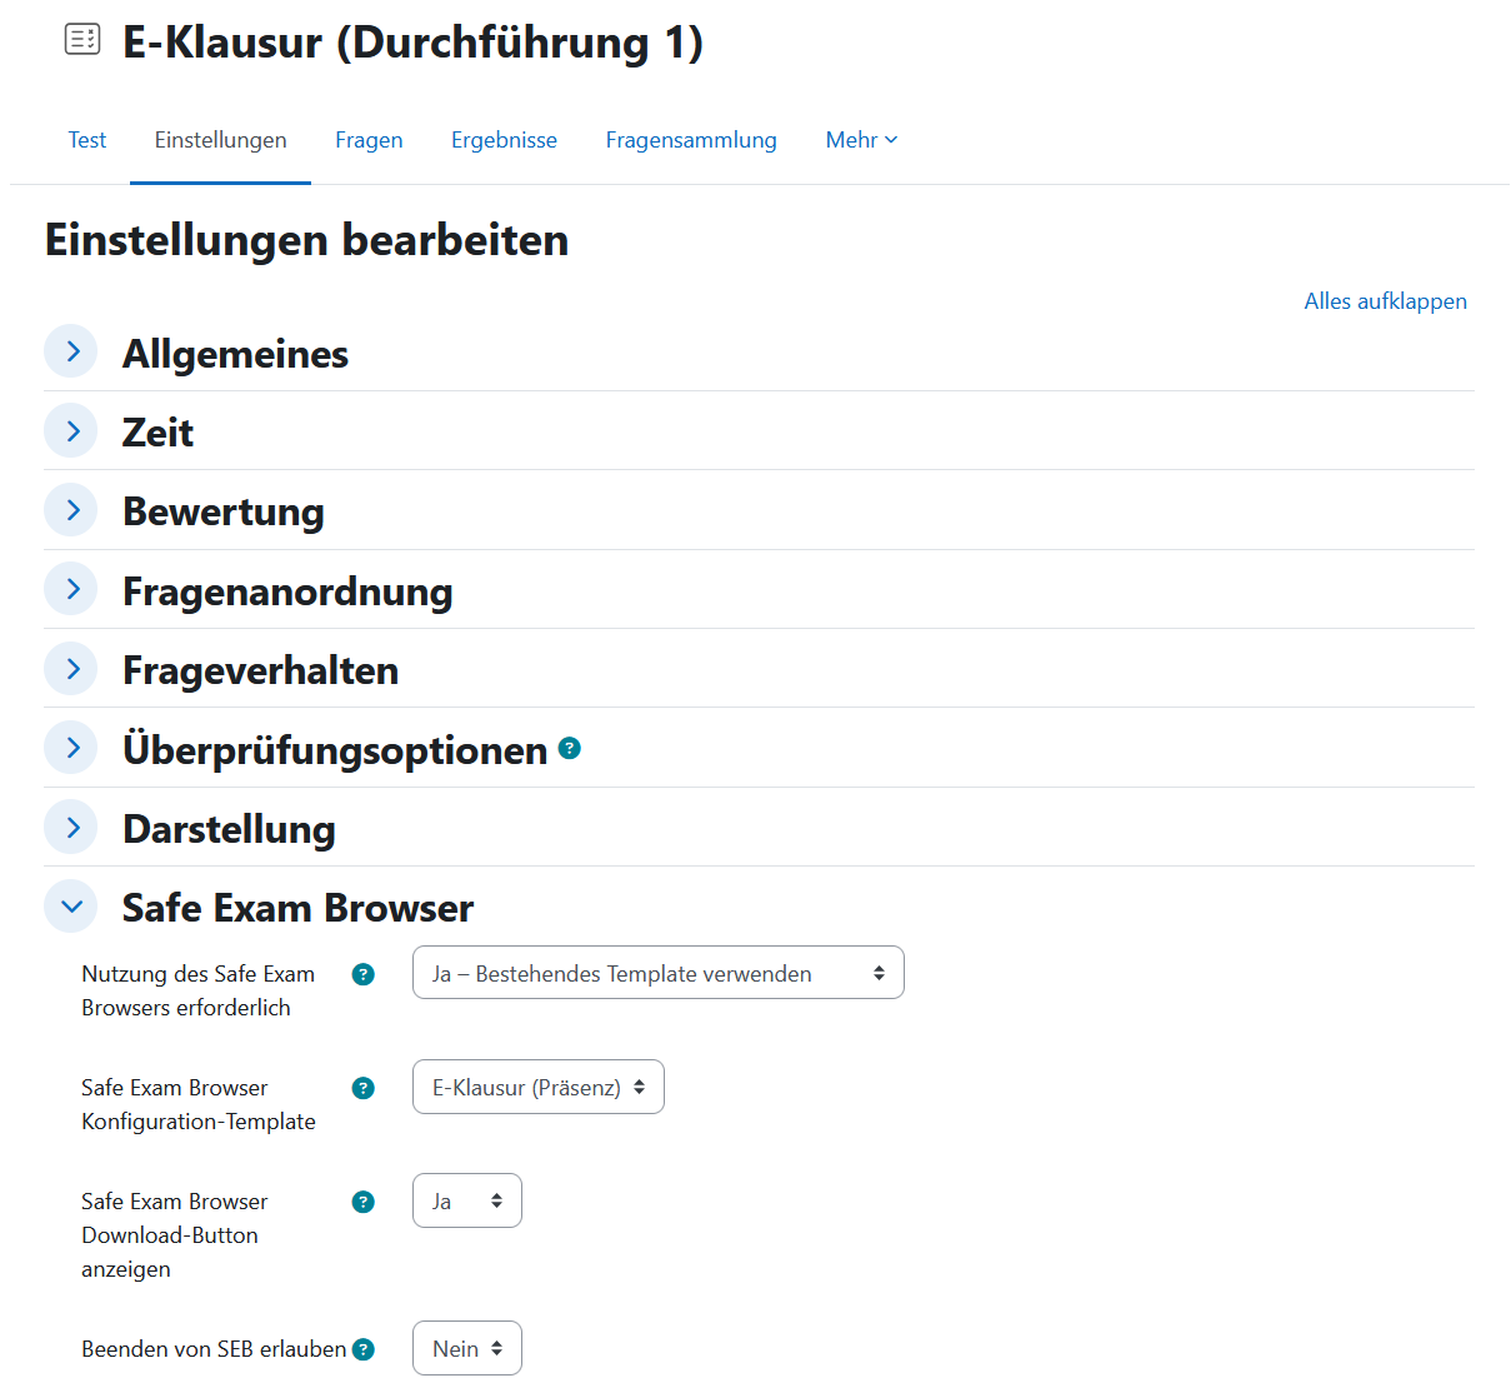
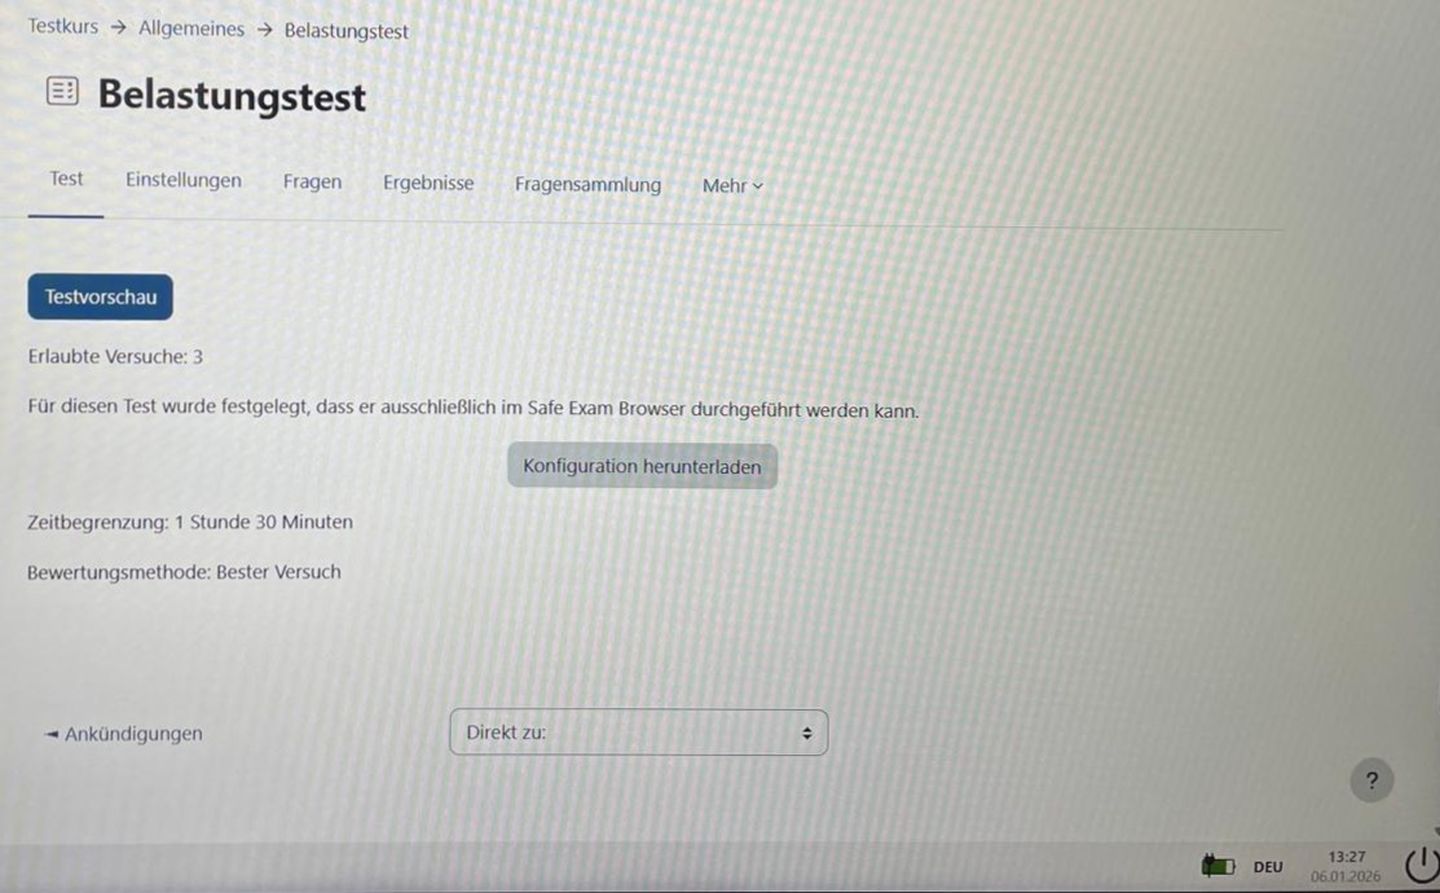
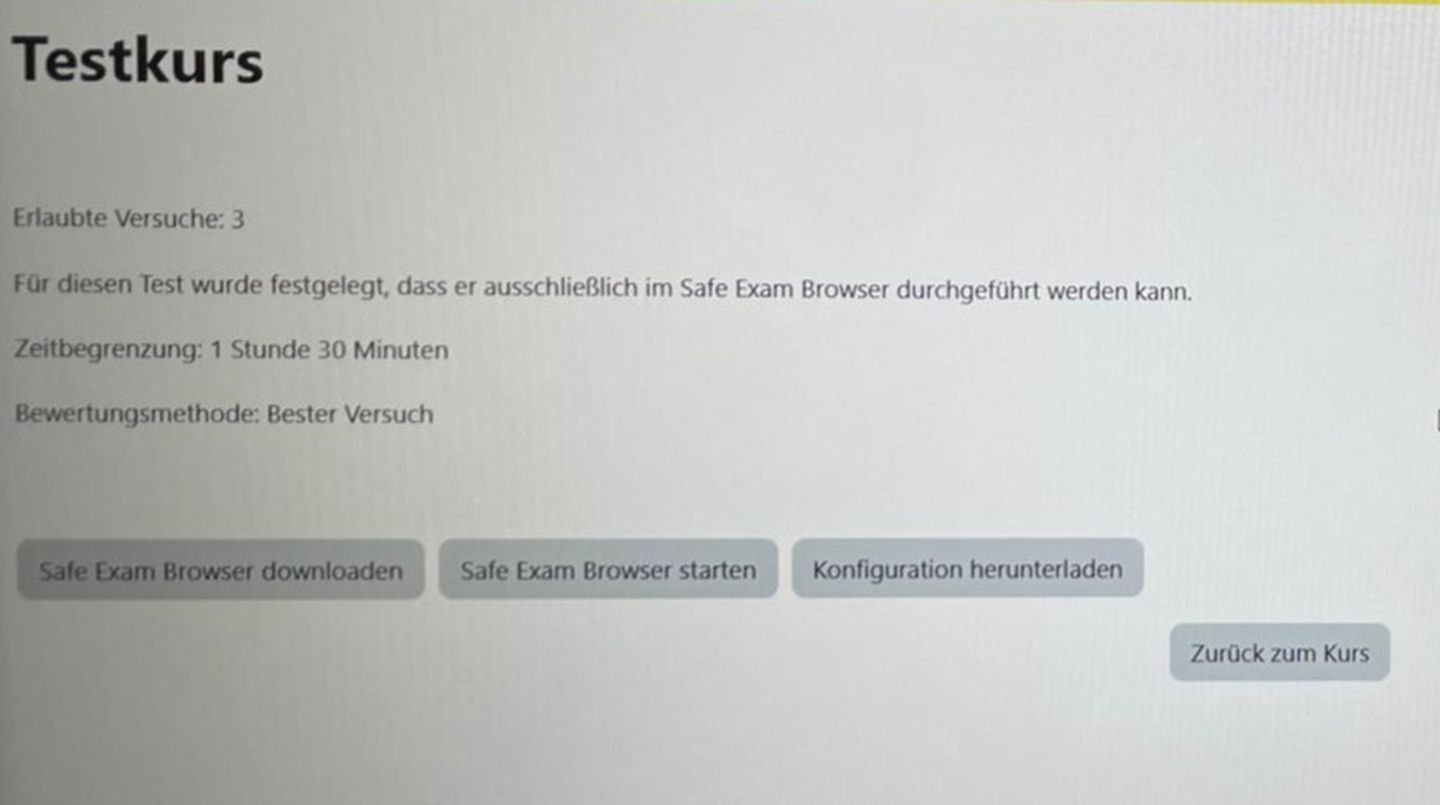
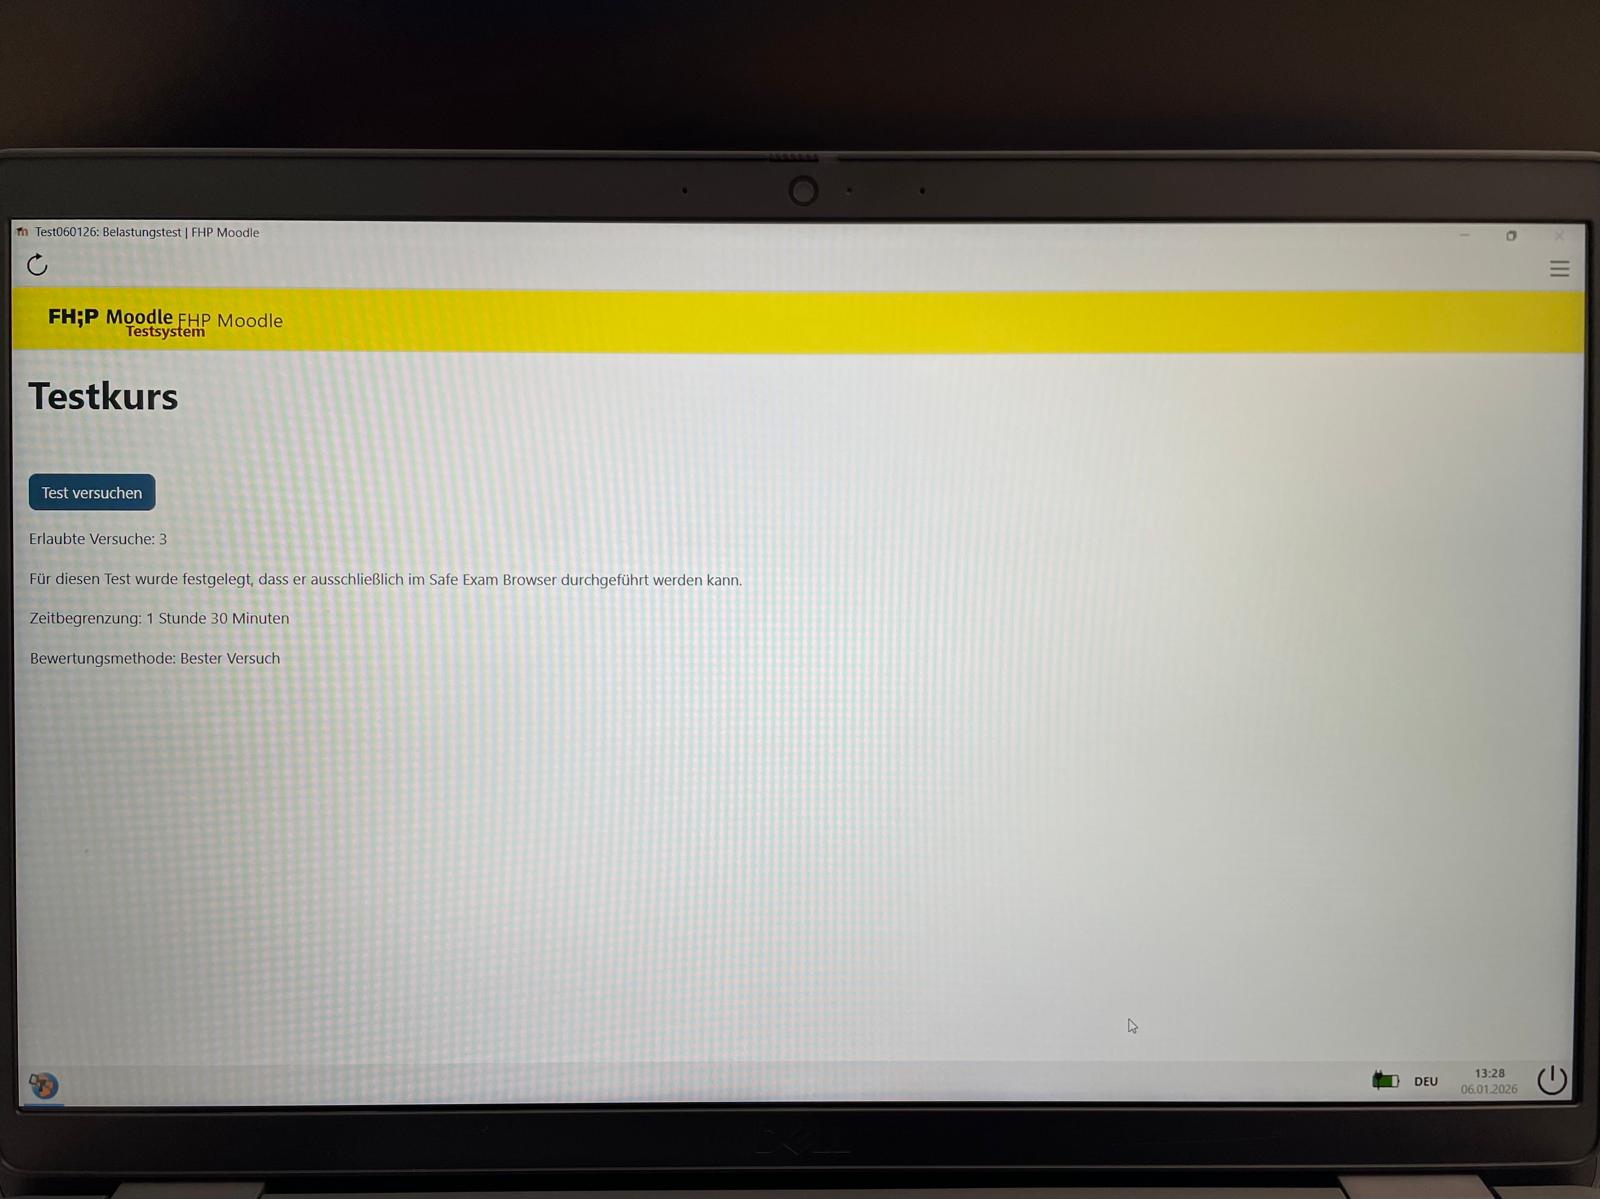
Safe Exam Browser (SEB)
With the Safe Exam Browser (SEB), an online exam can be started in a secure kiosk mode. In kiosk mode, only the Test activity can be started.
Procedure for course coordinators
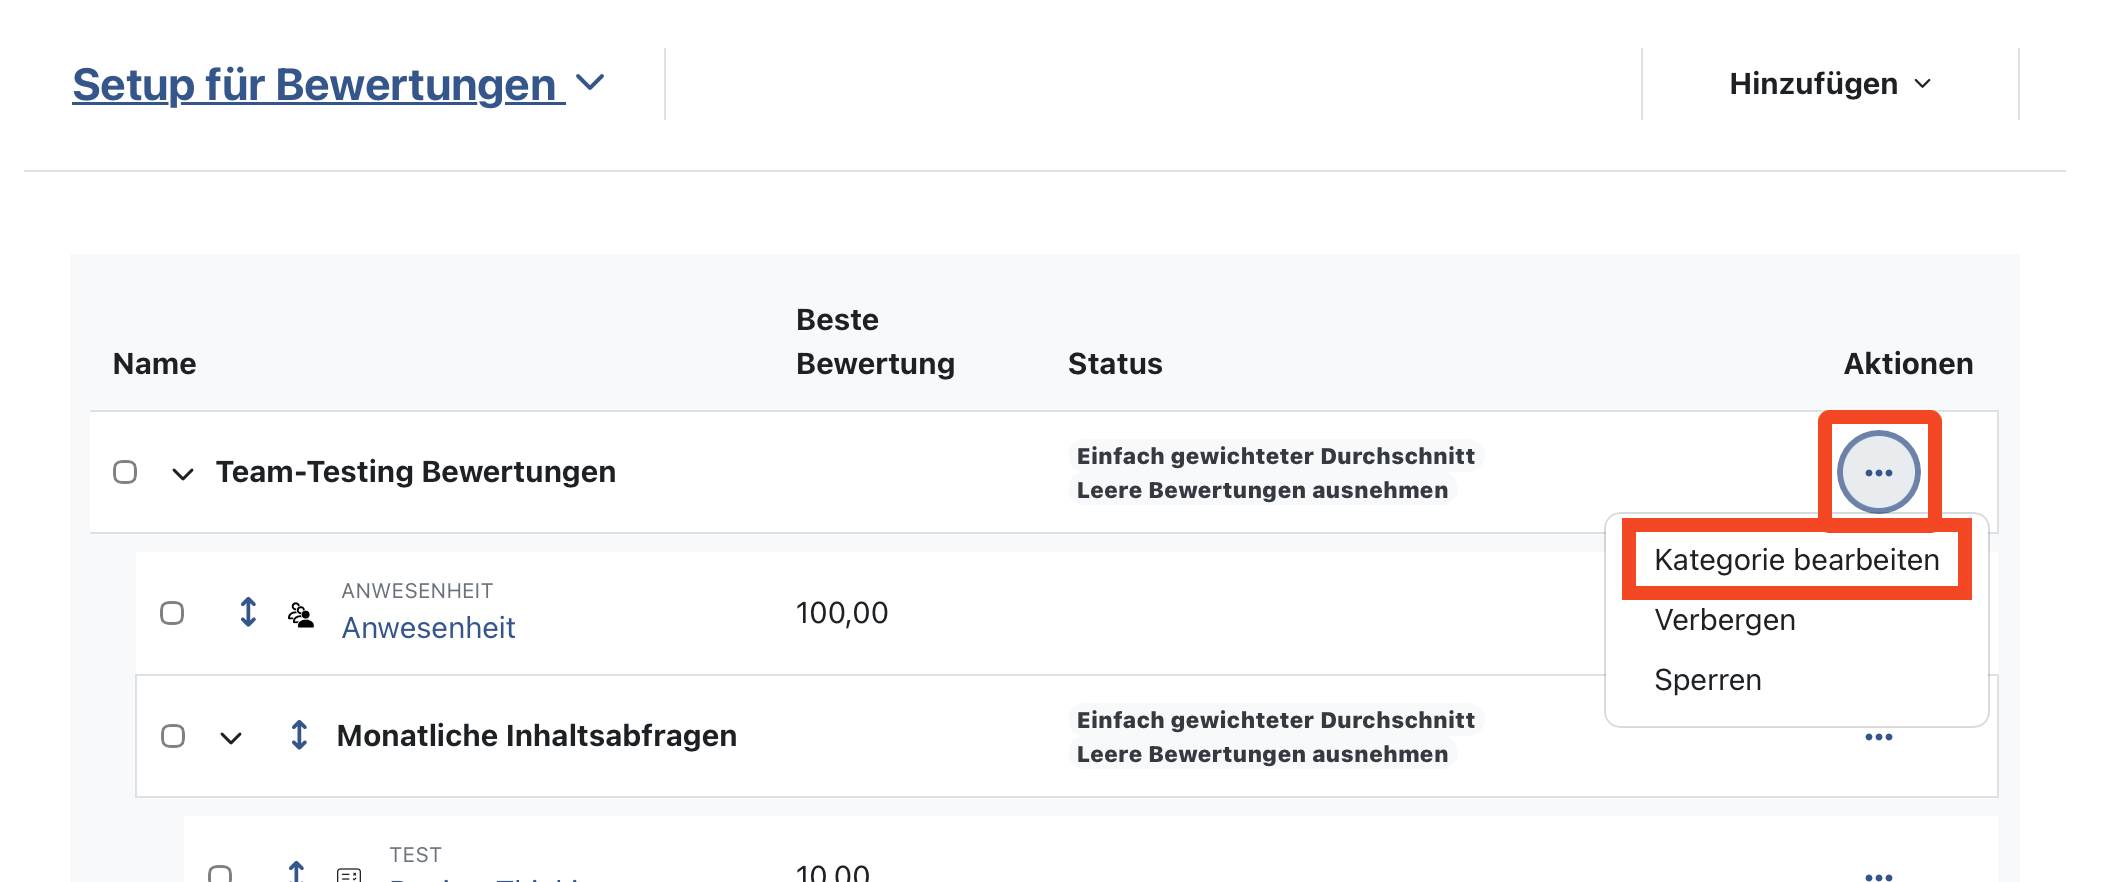
Archiving process Online checks
The Moodle exam instance itself is not intended for archiving. The responsibility for archiving, the provision of data in special cases and the timely deletion of online exams lies with the lecturers, even after you have left the University of Applied Sciences Potsdam. The archiving file is only forwarded to the Examination Services if a special case arises, such as an attempt to cheat. According to legal regulations, official examinations must be archived in an audit-proof manner for certain periods of time, together with the associated metadata. Audit-proof means that it must be verified that the files could no longer be edited after the backup. Moodle tests and .mbz backups can be subsequently modified. PDF files can also be edited retrospectively without additional certification. Therefore, these procedures alone are not suitable for the legally required audit-proof archiving of examinations. There are different procedures for audit-proof archiving for the various online examination forms. These are presented below.
Archiving online exams with the Quiz Archiver (Activity Test)
Online exams that have been carried out with the Test activity can be archived in an audit-proof manner using the external plugin "Quiz Archiver". The Quiz Archiver is only implemented on the Moodle exam instance. Take a look at the video tutorial. In the following accordion you will find a short instruction in text form.
Further information on the Quiz Archiver (activity test)
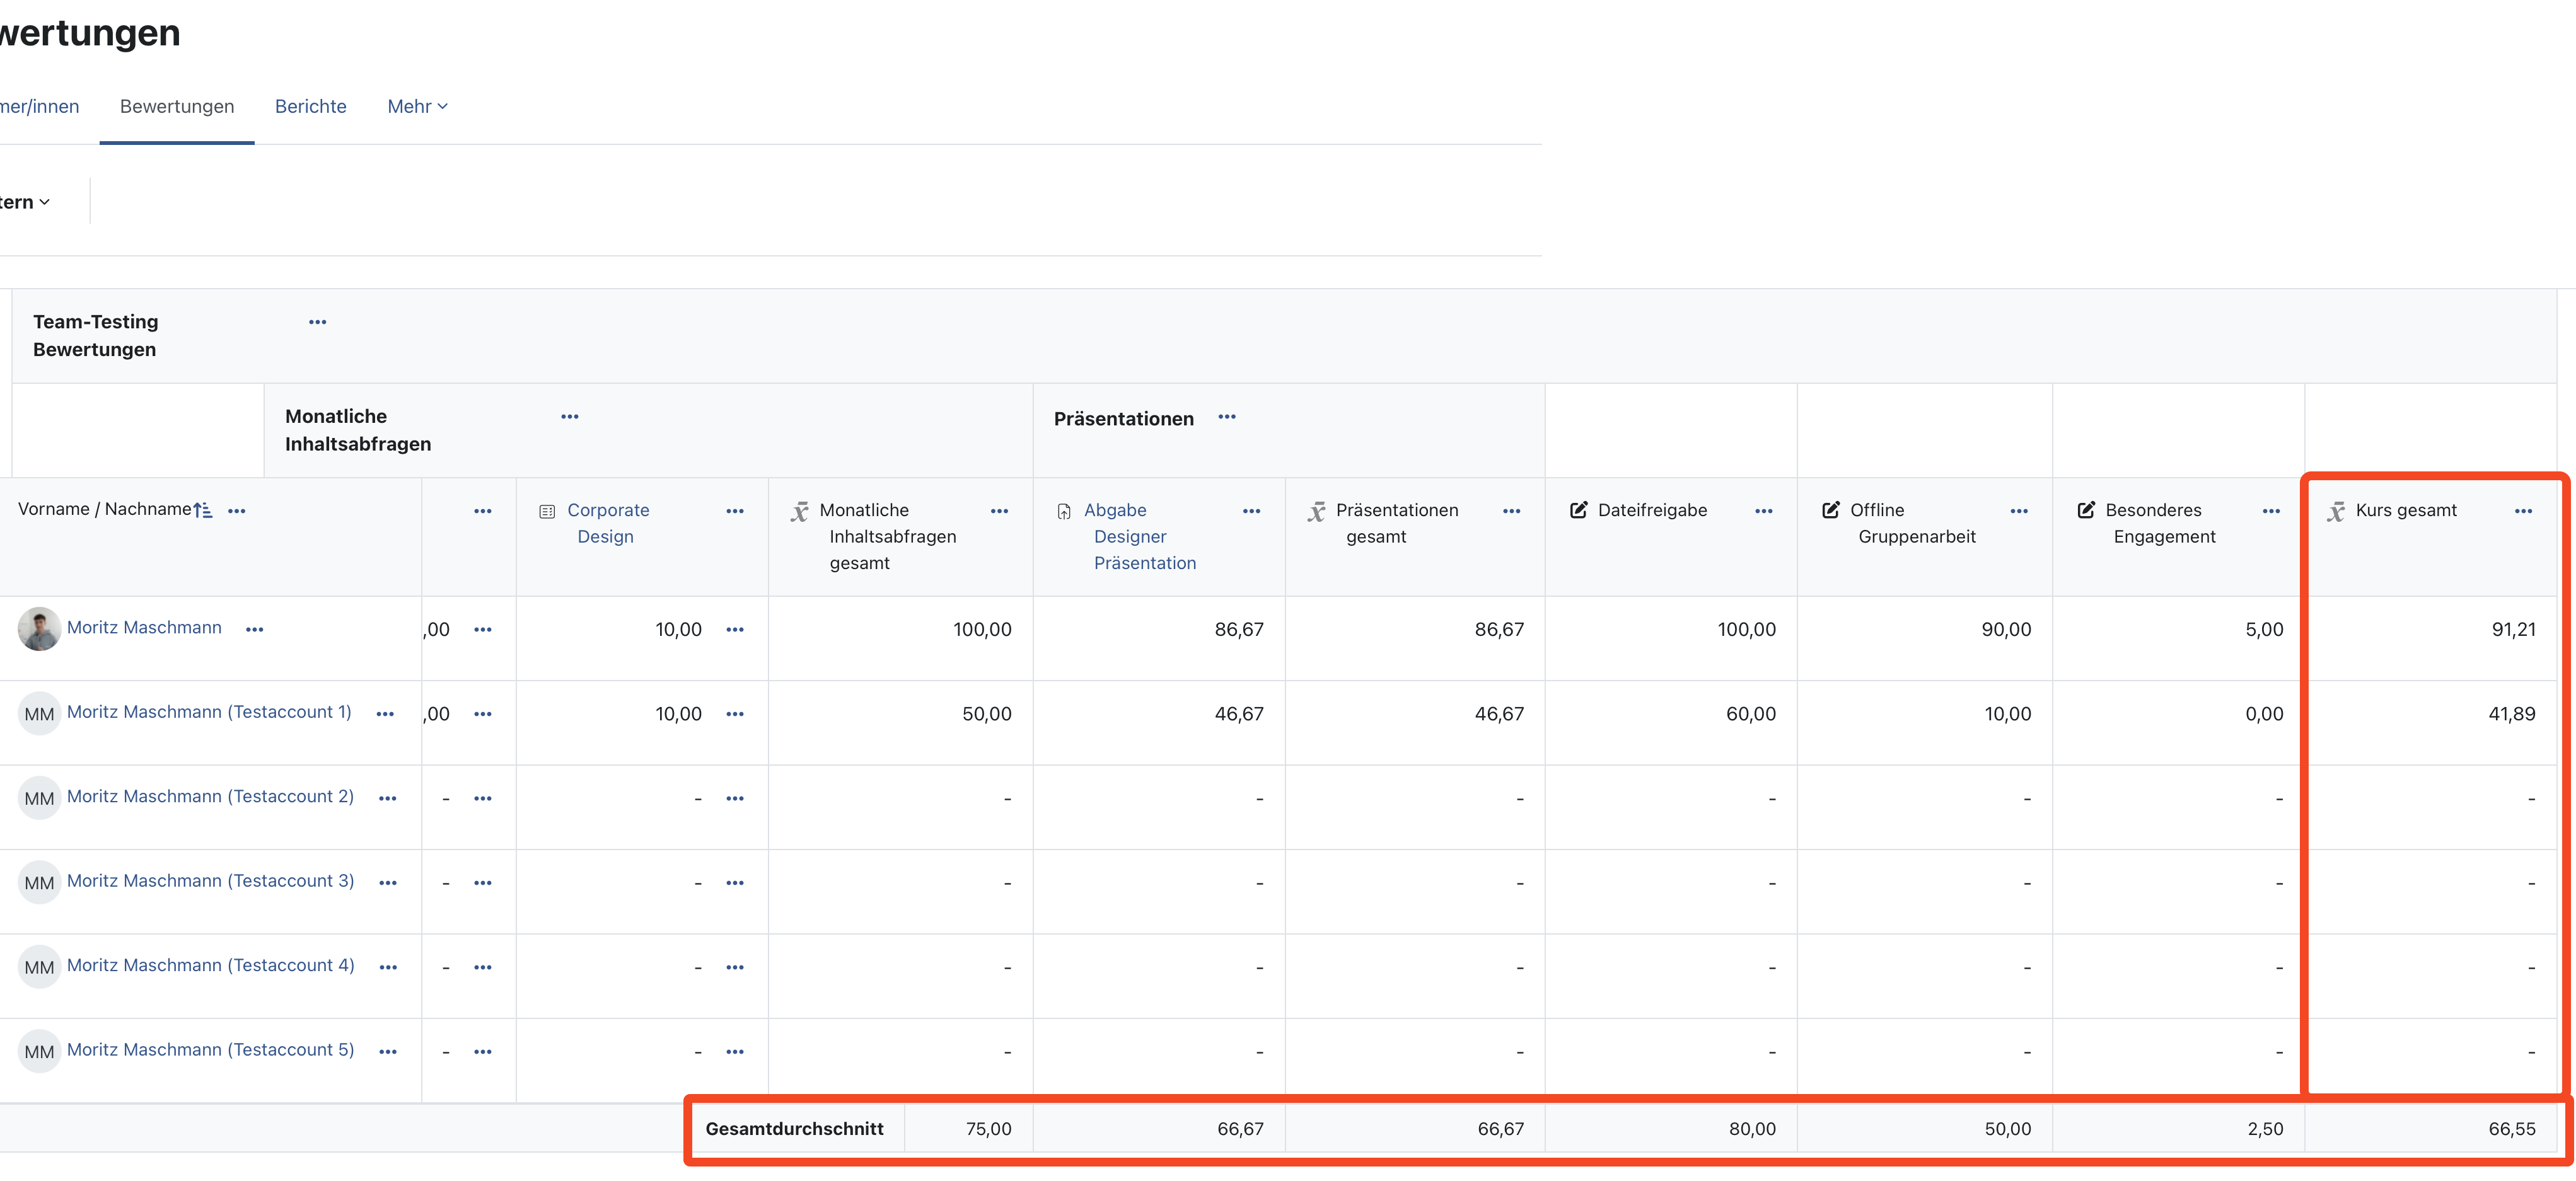
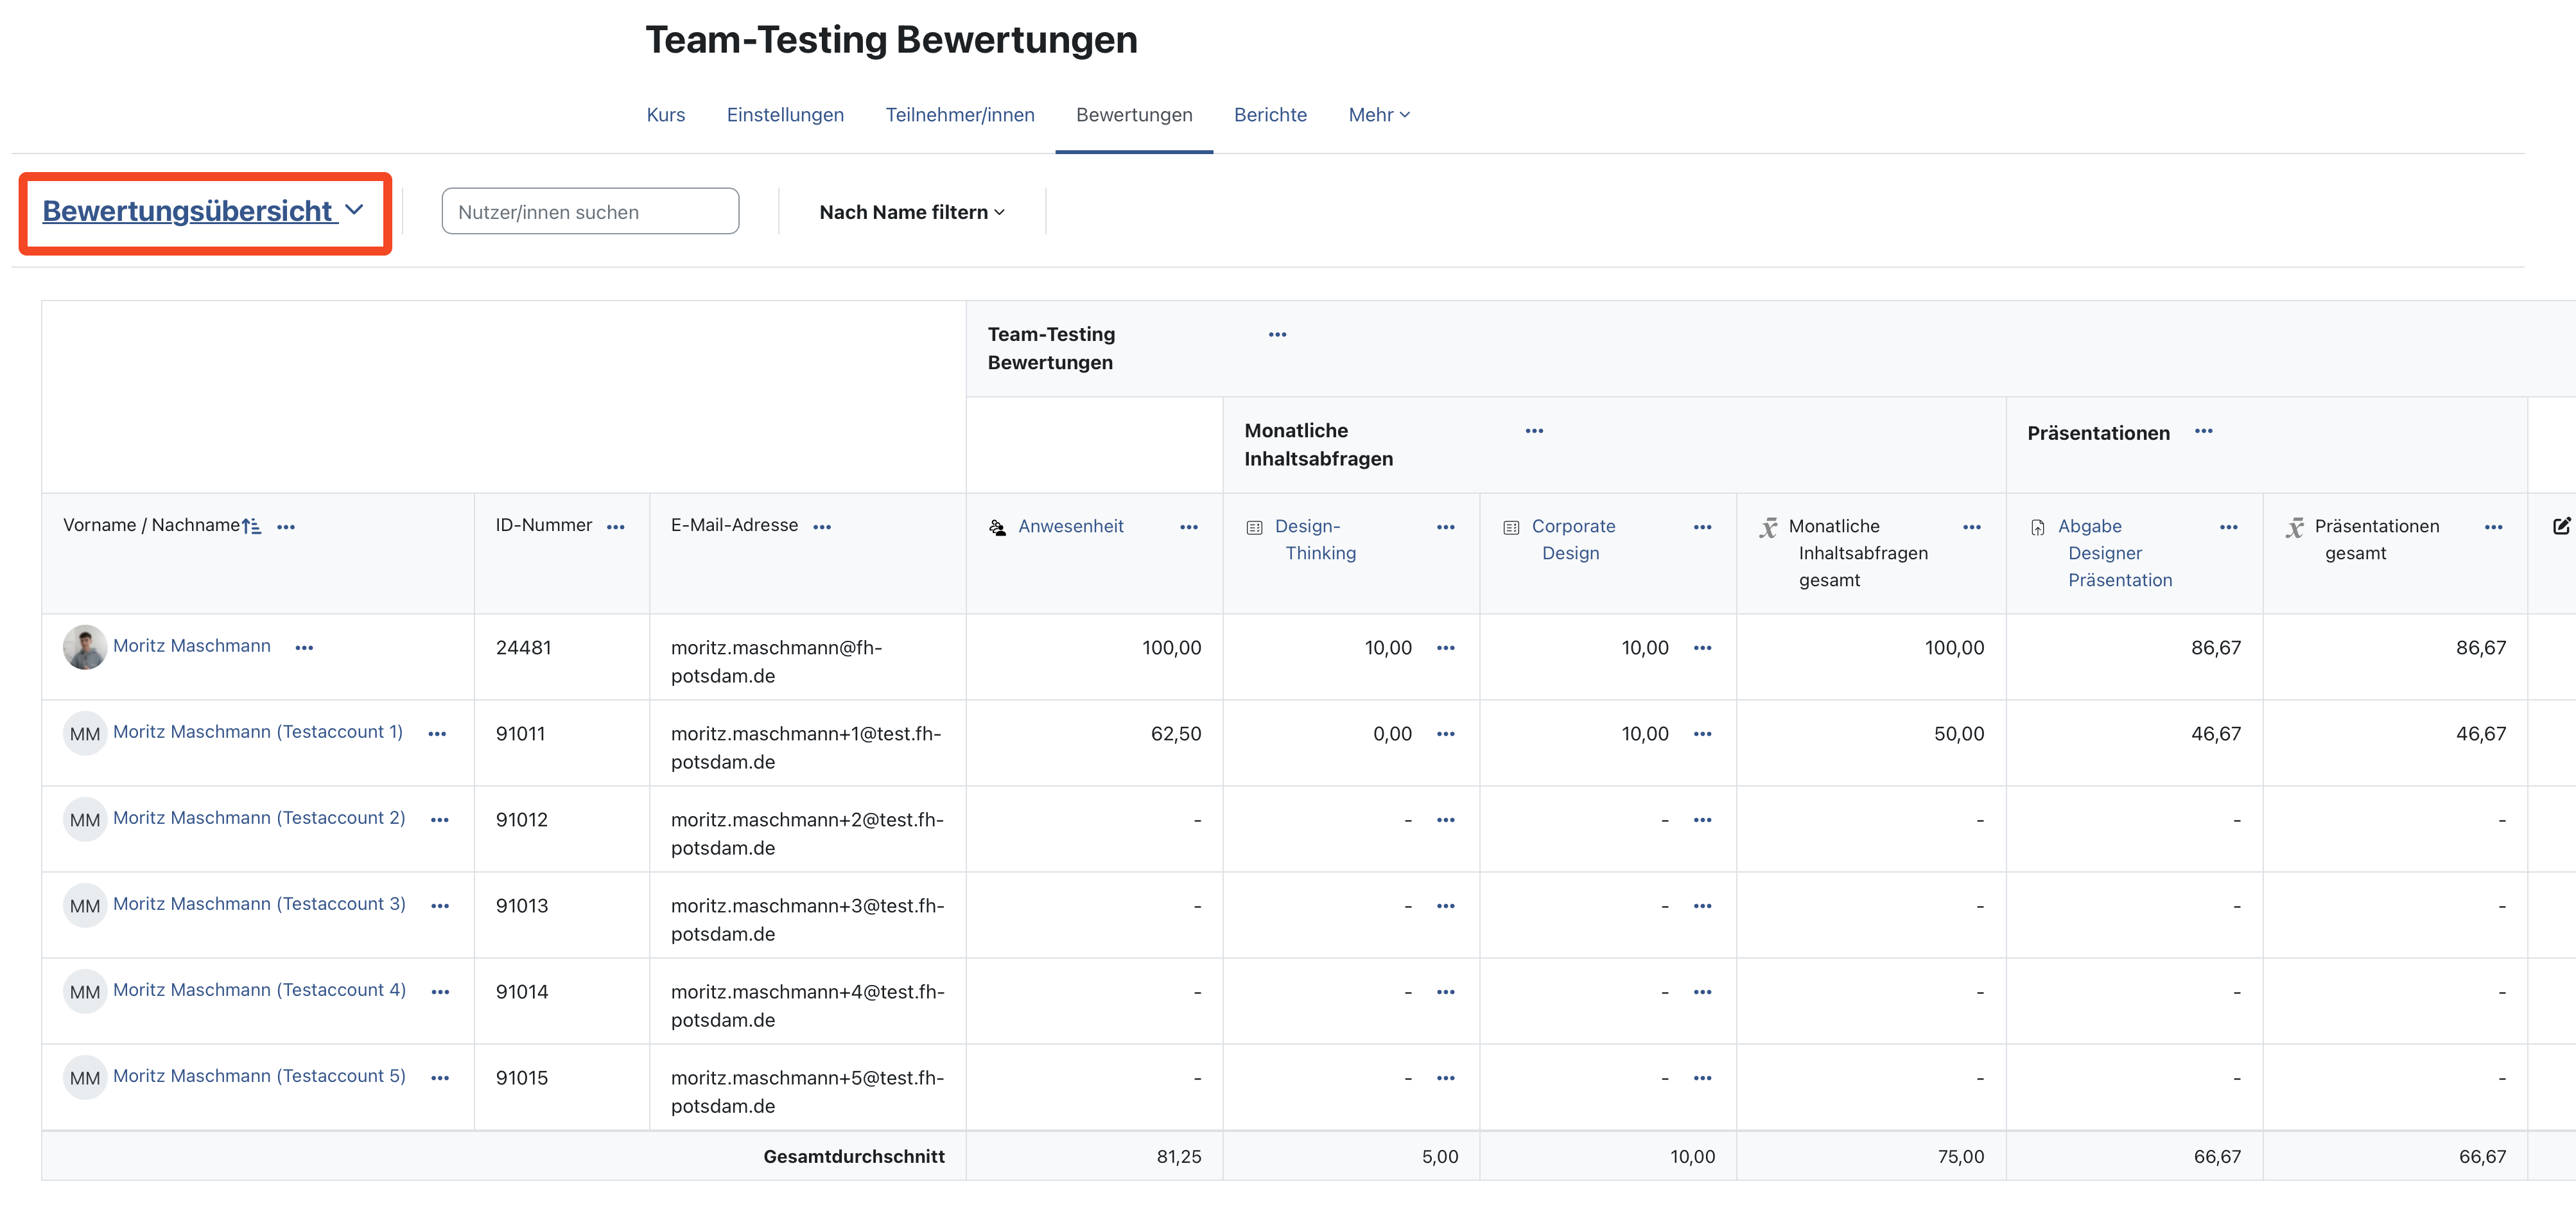
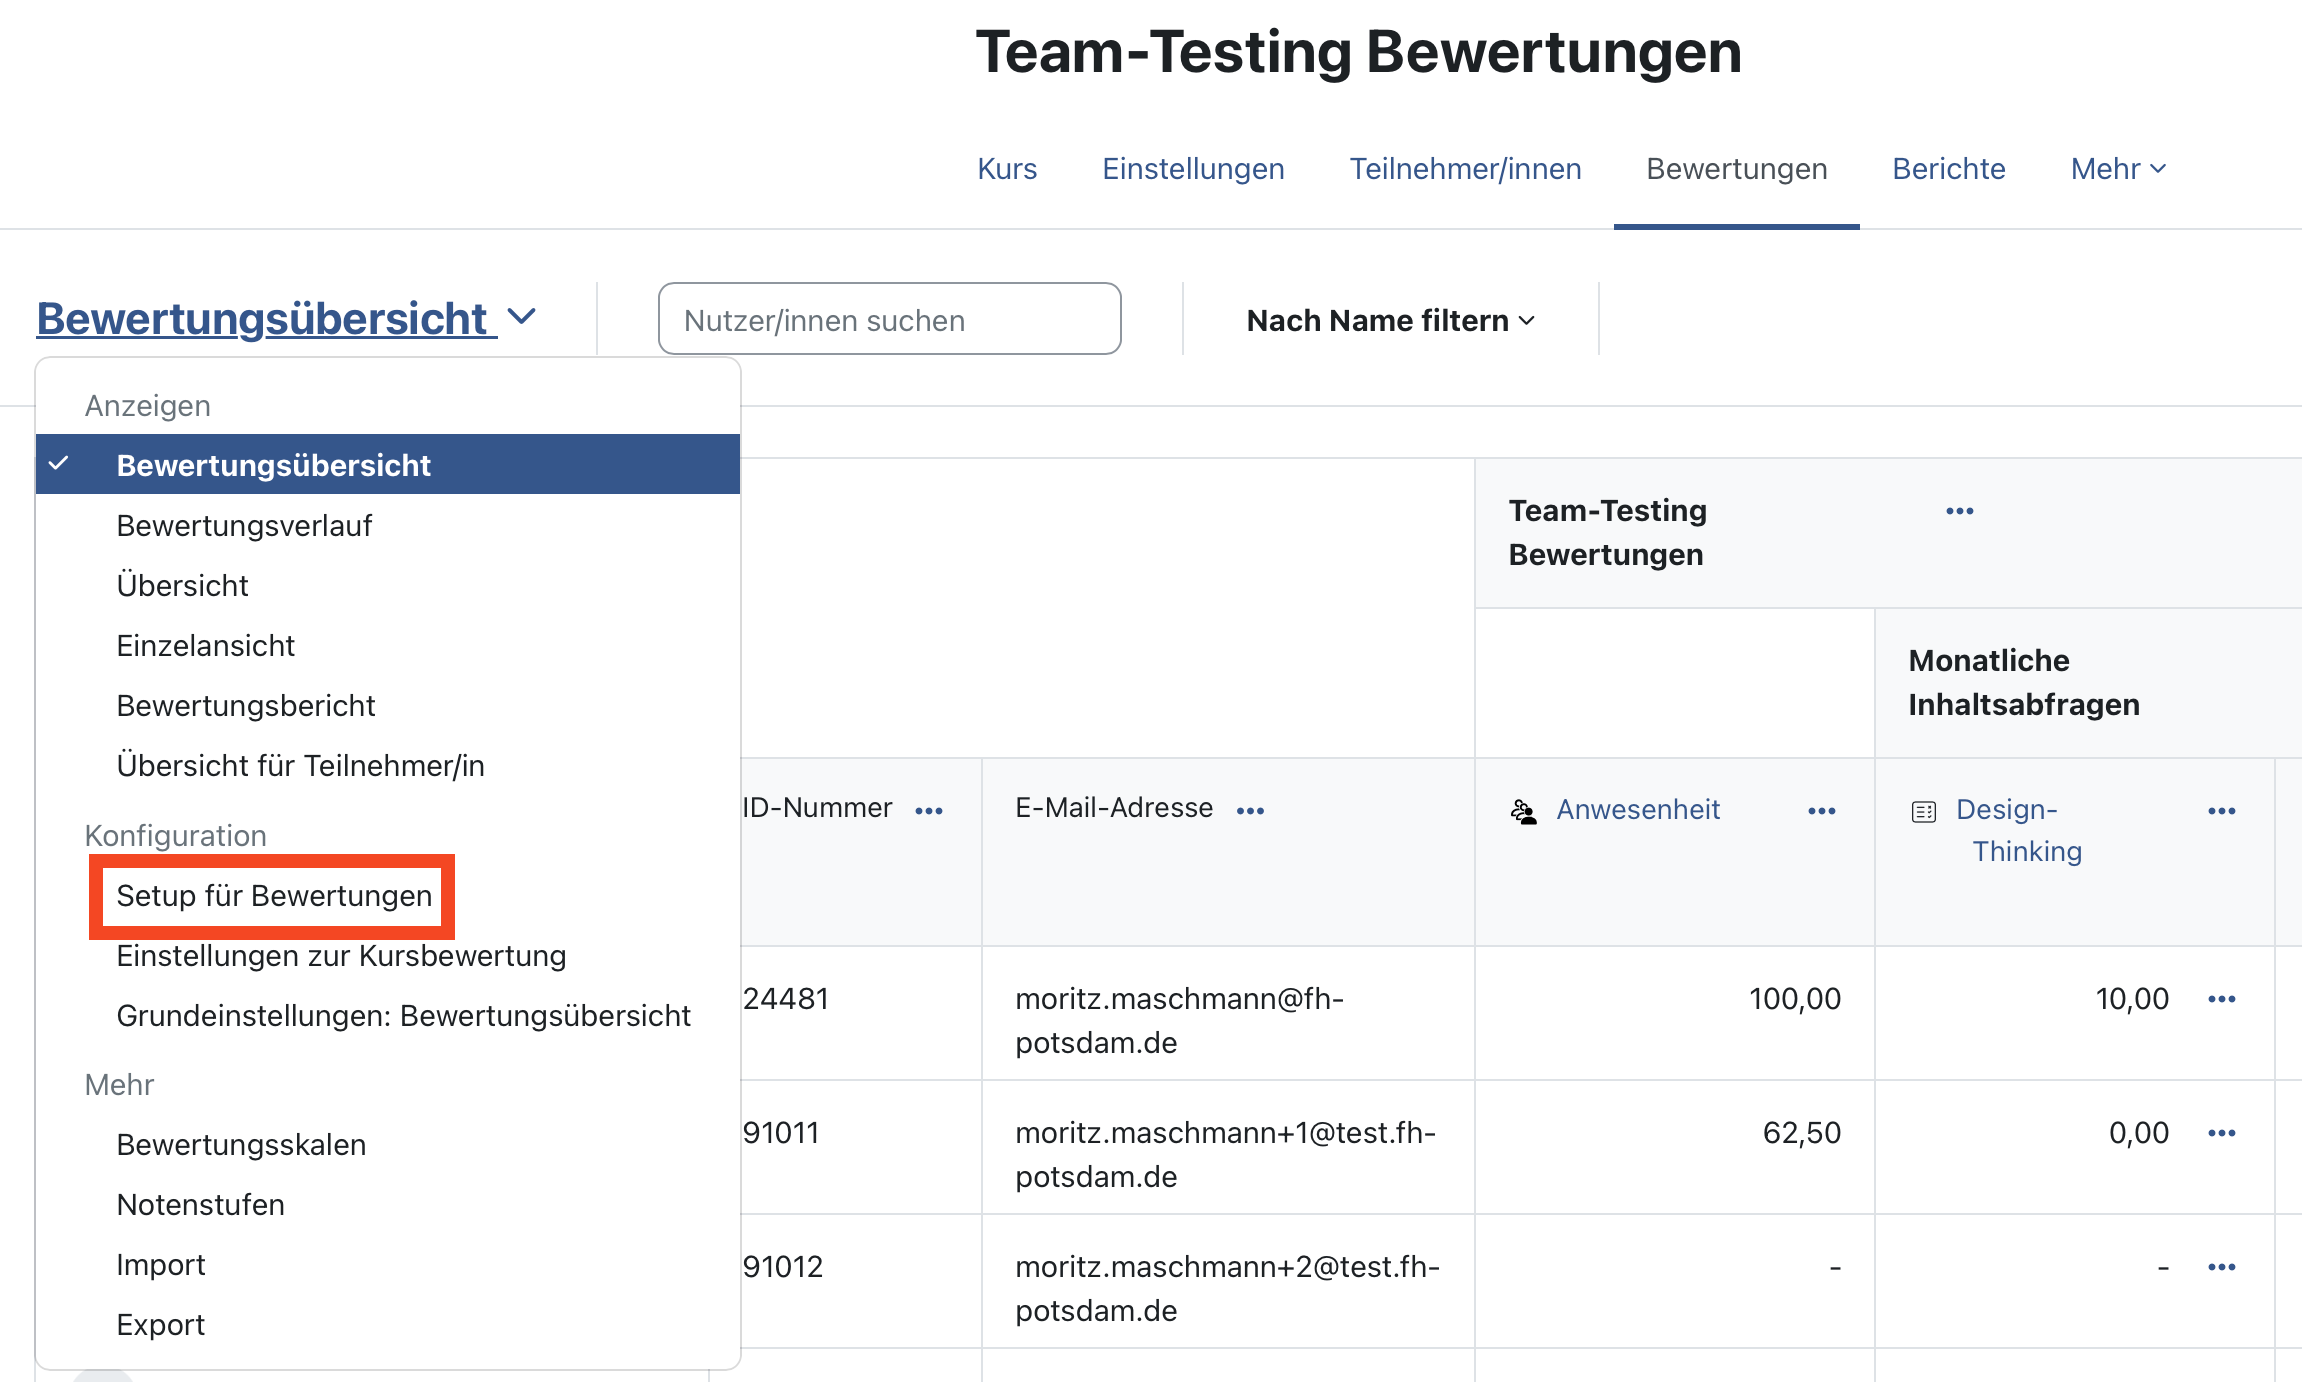
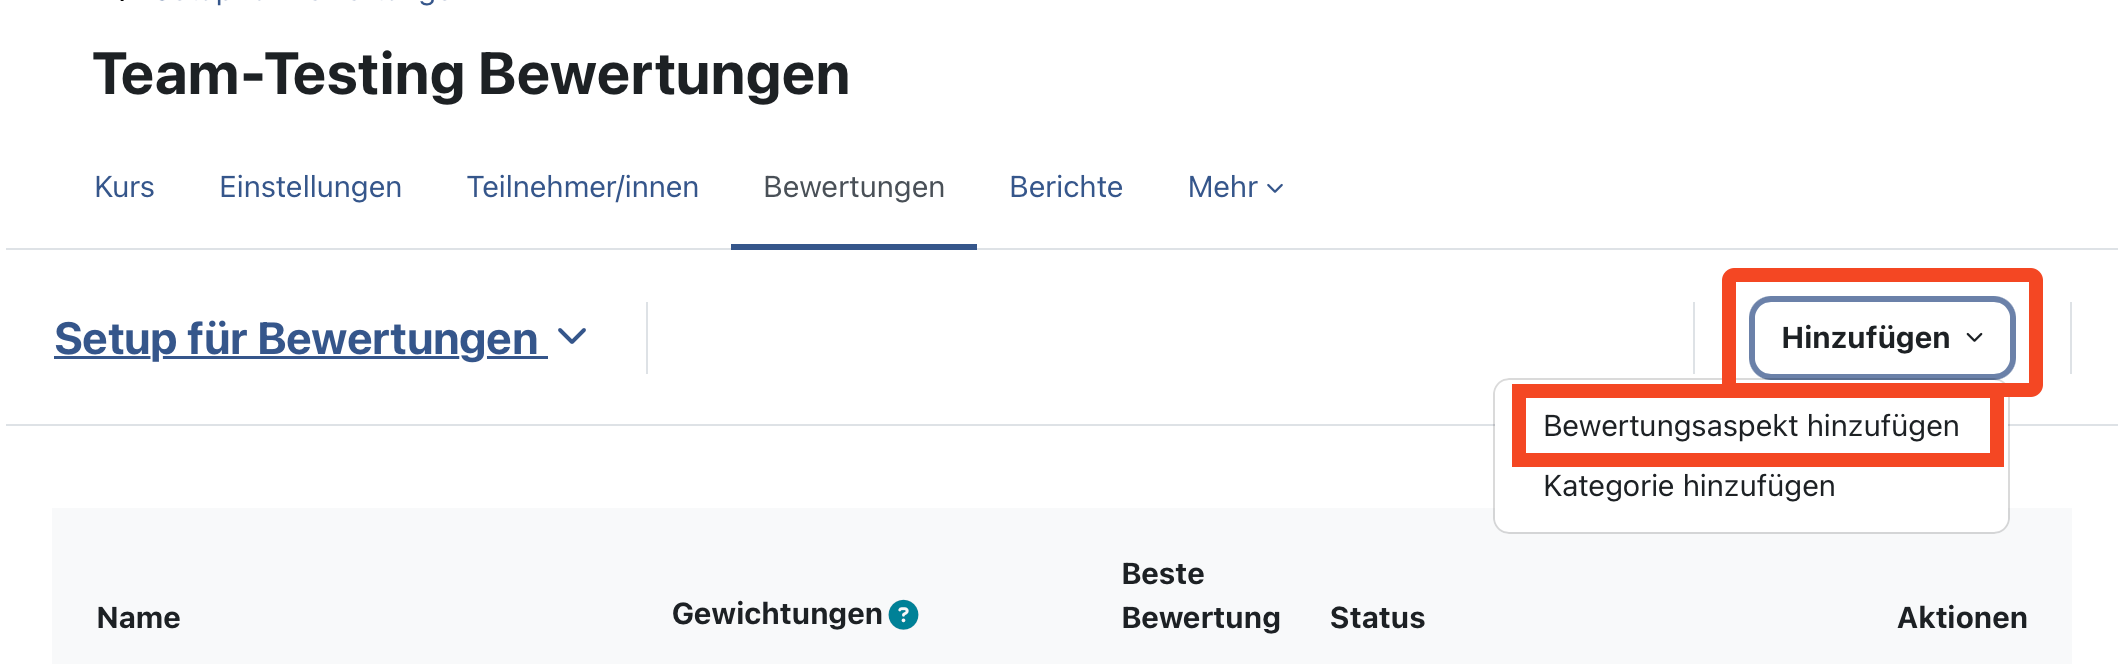
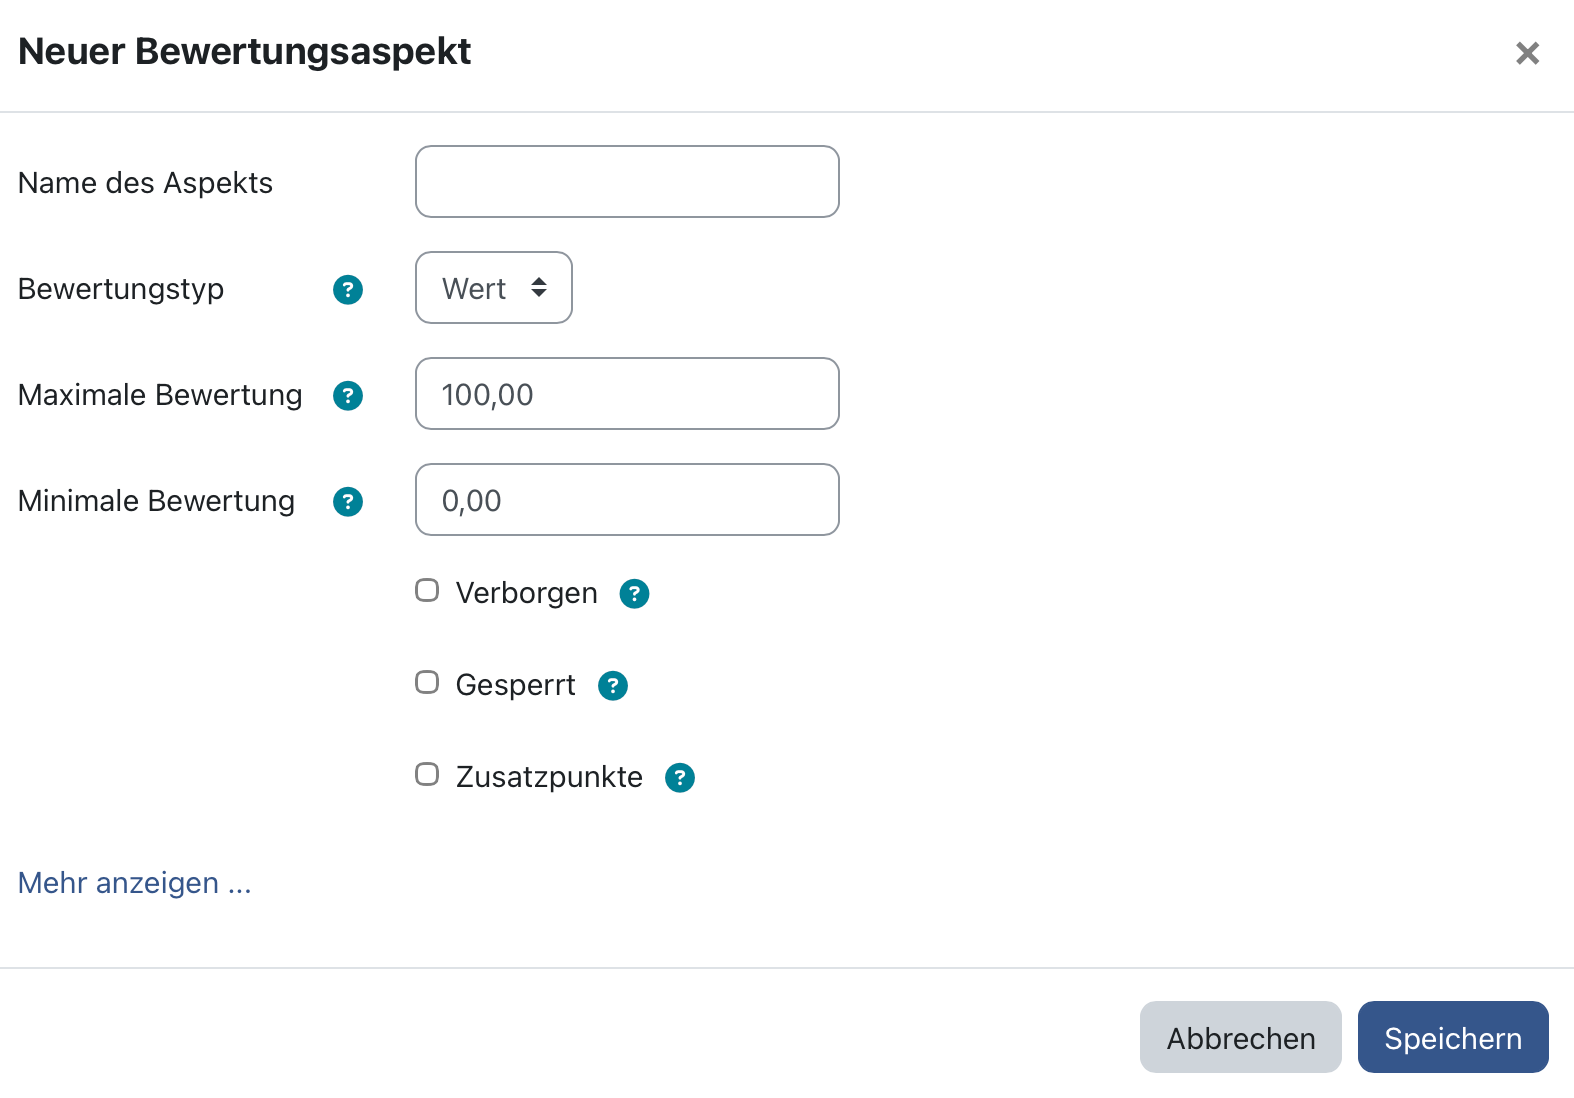
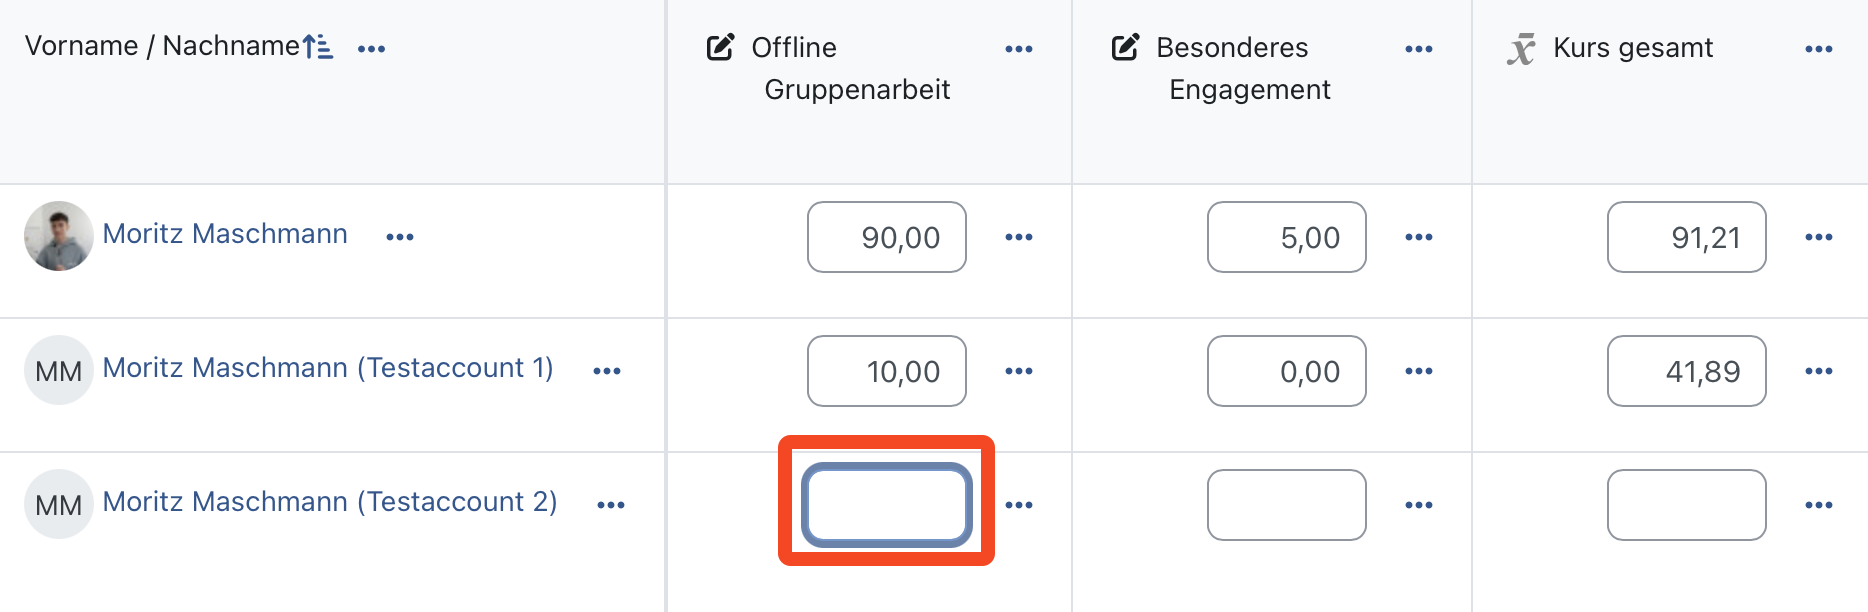
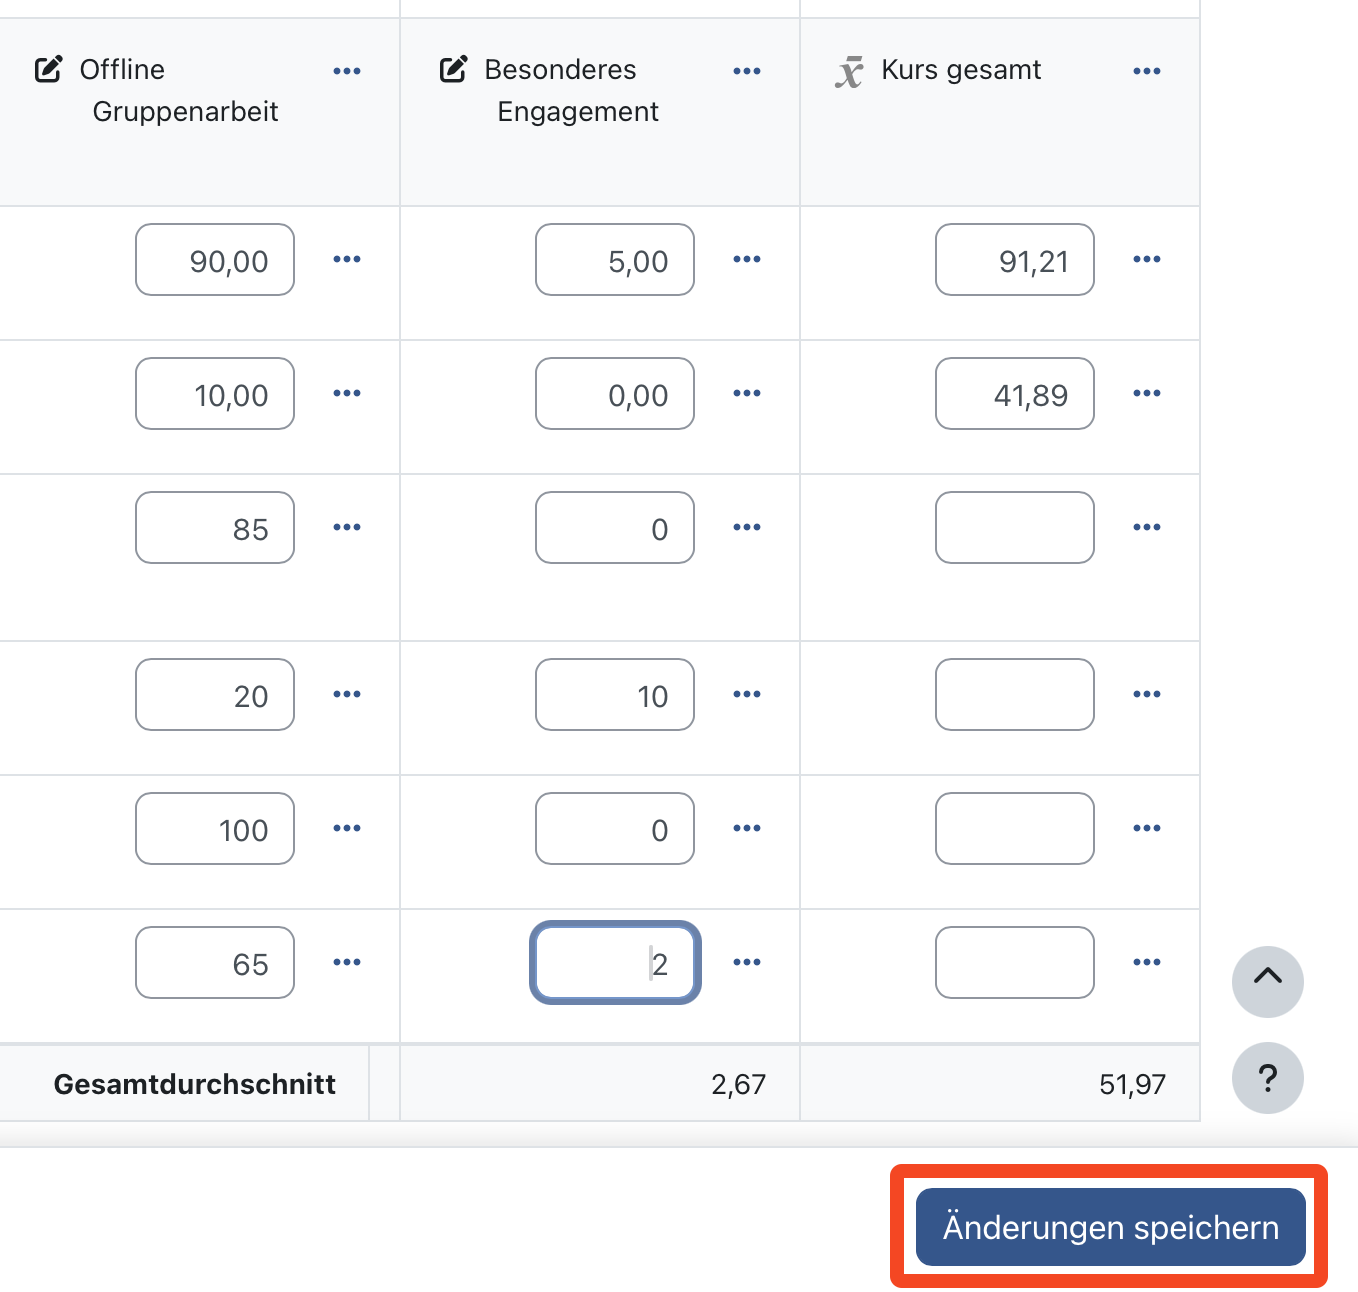
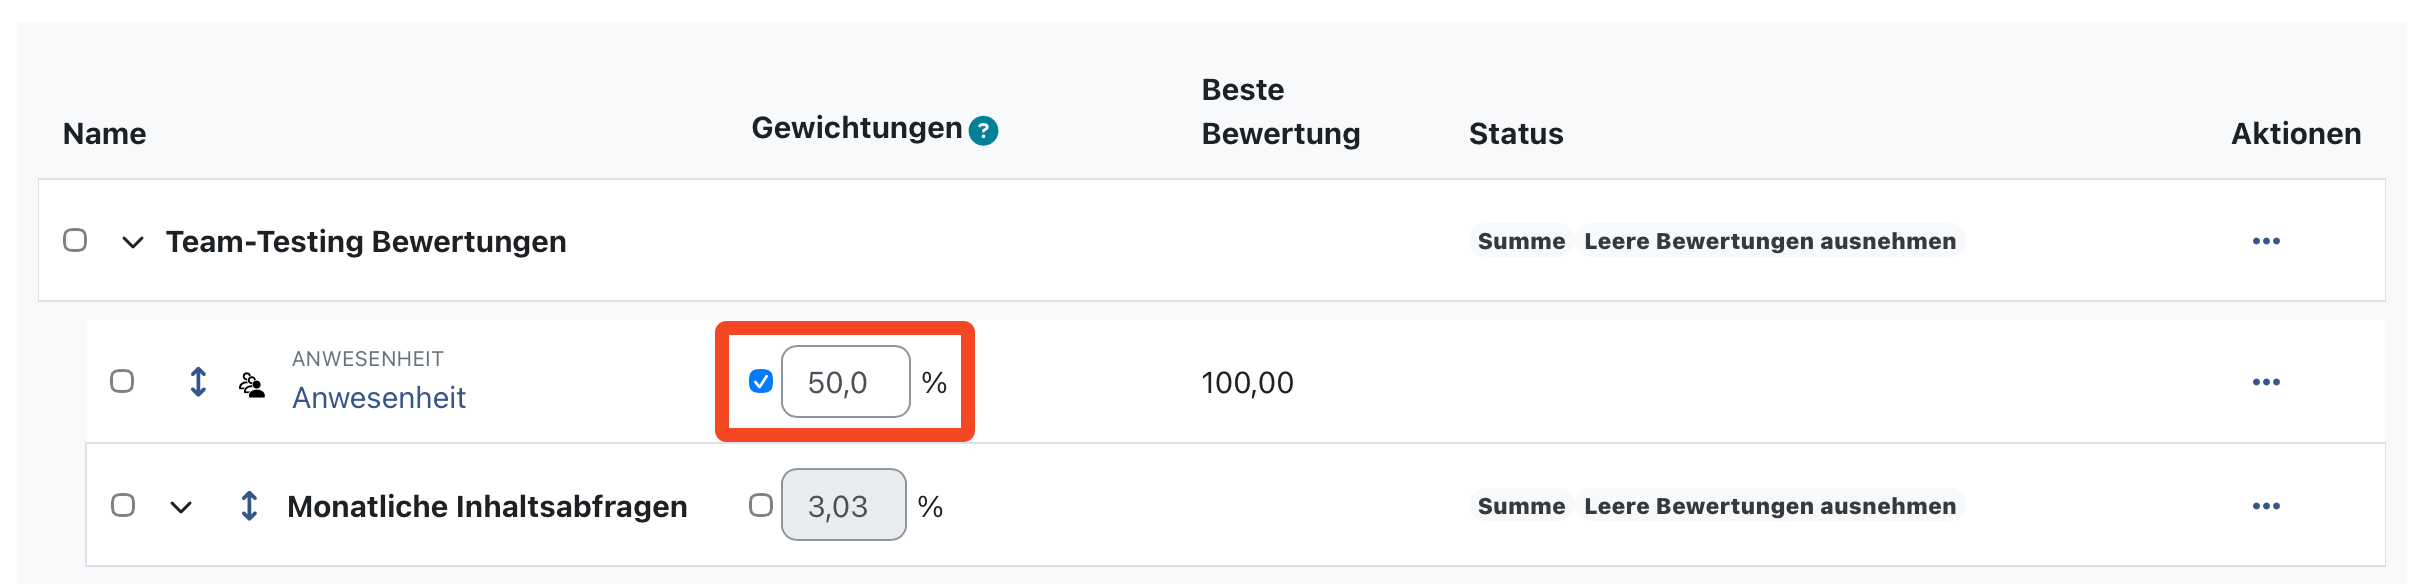
Assessments Portfolio tasks
The assessment feature in Moodle offers a good solution for sharing the results of tests and assignments with students. Moodle has preset settings for calculating overall results, but these can be customised and the overviews can be better structured. Instructions and help on the topic of assessments can be found here.
Requirements:
- Assessment activities have already been set up.
- All that remains is to set the assessment in the overall course context.
- Assessments from several assignments during a semester are added together.
- The weighting may vary.


Contact and services
Centre for Teaching and Learning (ZESL)
The student e-learning team offers support for the HelpDesk wiki for lecturers in the departments:
Central IT Services – Moodle Admin
Administration of all Moodle platforms:
Contact decentralised Moodle supervisors
Regular Moodle support for teaching staff in the departments is provided by the decentralised Moodle supervisors. However, these may be organised differently depending on the department. You will receive more detailed information on the process and the requirements in your own department on a decentralised basis.
Credits, OER material, editorial notes
With the exception of proper names and trademarks, the text on this page can be used as OER material under your own responsibility under foglender licence:
Content: Julia Lee (overall concept, almost all texts and videos), with the exception of Charlotte Warkentin (enrolment methods), student e-learning team of the Digital Teaching department (ongoing updates), University of Applied Sciences Potsdam, licence: CC BY-SA 4.0.
Updates by the ZESL student e-learning team if necessary.
Moodle software (e.g. screenshots, screencasts): Copyright Martin Dougiamas, with contributions from various developers, licence GNU General Public License, version 3.
Moodle Documentation (if cited): Copyright of the authors, i.e. history of the wiki articles, licence: GNU General Public License, version 3.
The University of Applied Sciences Potsdam does not guarantee the legal, technical and organisational conditions of the materials. Any further use is at your own risk. Most of the images, graphics and videos can also be used and edited as OER material. The licence details can be found directly below the material or embedded in the video.
Editorial notes:
The HelpDesk wiki uses asterisks * to indicate gender. Since Moodle uses the slash / to genderise role designations, this is retained when referring to a Moodle role.